


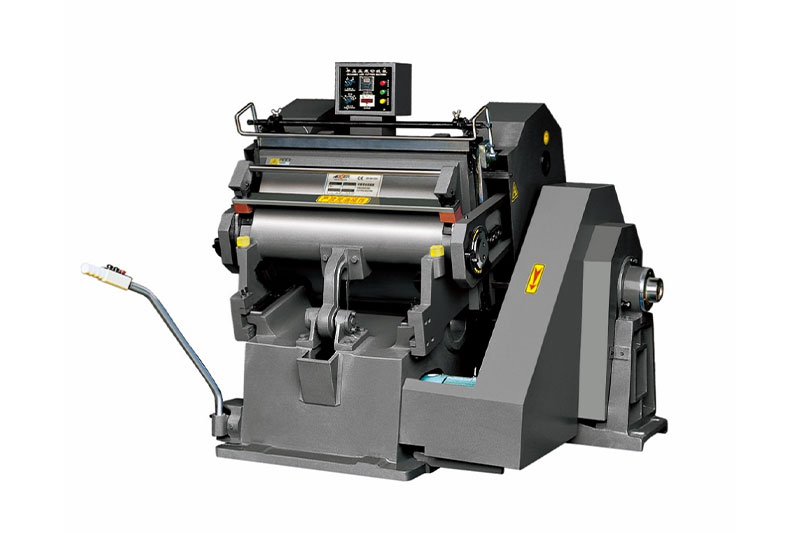
Using a die cut machine involves precise setup, material alignment, and controlled cutting to achieve clean, professional results. Below is a step-by-step guide for operating most die cut machines, applicable to crafting, packaging, and industrial cutting tasks:
Select the Die
Choose a cutting die that matches your design (e.g., metal steel-rule dies for paper/cardstock, laser or rotary dies for fabrics/plastics). Ensure the die is sharp, intact, and compatible with your machine’s size and type.
Prepare Materials
Cut your material (paper, fabric, plastic, etc.) to a size that fits the machine’s platform. Check the material thickness—most machines have a maximum thickness limit (e.g., 3mm for paper-based dies, up to 10mm for industrial models).
Inspect the Machine
Clean the machine’s platform and remove any leftover debris from previous cuts. Lubricate moving parts (if required by the manual) and ensure the power source is stable (for electric models) or the manual handles move smoothly.
Secure the Die
Place the die blade-side up on the machine’s cutting platform. Most machines use magnetic bases, clamps, or adhesive mats to hold the die in place. For manual machines, align the die with the platform’s registration marks.
Calibrate Positioning
If cutting a specific design, use the machine’s grid, rulers, or alignment guides to position the die correctly. For complex layouts, test with scrap material to ensure the die is centered and straight.
Adjust Pressure
Use the machine’s pressure knob, lever, or digital interface to set the appropriate pressure:
Thin materials (paper, vinyl): Low to medium pressure (e.g., 5–10 lbs).
Thick materials (cardboard, foam): Medium to high pressure (e.g., 15–25 lbs).
Pro Tip: Start with lower pressure and increase gradually to avoid over-cutting.
Set the Cutting Depth/Stroke
Ensure the machine’s (press plate) travels far enough to fully cut through the material without damaging the platform. For manual machines, this is controlled by the handle’s travel distance; for electric models, use the depth adjustment settings.
Test Cut
Run a test cut with scrap material to check if the die cuts completely through without tearing or leaving uncut edges. Adjust pressure/depth if needed.
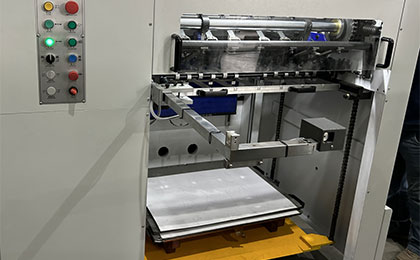
Place the Material
Lay the material flat over the die, ensuring it covers the entire cutting area. Use clips, adhesive tapes, or the machine’s built-in rollers to hold the material steady and prevent shifting.
Initiate the Cut
Manual machines: Turn the handle or crank slowly and steadily to move the 压板 over the die. Avoid forcing the handle to prevent damage.
Electric/automatic machines: Press the start button and let the machine feed the material through the die. Some models have the material loaded on a roller for continuous cutting.
Batch Cutting
For multiple pieces, align each material sheet with the die’s position using registration marks or guides to ensure consistent cuts.
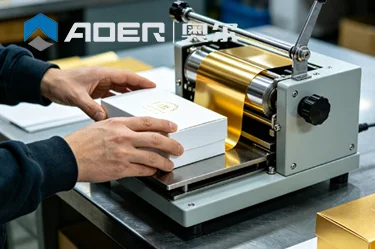
Extract the Finished Pieces
Lift the and gently remove the material. The cut pieces may remain in the die; use a pin or small tool to push them out if needed. Save intricate die-cut shapes carefully to avoid bending or tearing.
Inspect Quality
Check for clean edges, complete cuts, and no residual material stuck to the die. If there are rough edges, recheck the pressure settings or clean the die blade.
Maintenance
Turn off the machine and unplug it (if electric). Clean the die with a soft brush to remove debris, and store it in a dry, safe place. Wipe the machine’s platform and lubricate moving parts as per the manual.
Safety First: Always disconnect power or release tension in manual machines before installing/removing dies. Keep hands away from moving parts.
Material Compatibility: Verify that your machine supports the material you’re using (e.g., some craft machines can’t cut metal, while industrial models handle heavy-duty materials).
Die Care: Regularly inspect dies for rust or dull blades. Sharpen or replace them as needed to maintain precision.
By following these steps, you can efficiently use a die cut machine to create precise shapes for projects like scrapbooking, packaging design, signage, or industrial manufacturing.If you want to know more about Die Cutting Machine and other products, Aoer can contact us and we will do our best to help you.
GET A QUOTE
